



Key Takeaways
- Establish the household brief and existing conditions before committing to a layout.
- Approve coordinated drawings and specifications, not just attractive perspectives.
- Connect each stage to a deliverable, an owner decision and a responsible person.
- Keep changes, inspections and handover records in one shared project trail.
The landed interior design process turns your household needs into a coordinated brief, layout, specification and completed home. In Singapore, the right sequence depends on the existing building and the proposed scope, including whether professional submissions or structural work are involved. Progress should be measured by resolved decisions and usable documents as well as visible site activity.
This guide focuses on what each design stage should produce and what you need to approve. It is particularly useful when comparing proposals that use similar stage names but include different levels of detail, coordination or site involvement.
What Official Guidance Means for the Design Sequence
BCA’s building plan submission guidance explains the Qualified Person’s role in submitting plans where approval is required. This creates an important early question for the design team: which parts of the brief need professional assessment before the owner treats the concept as buildable?
An interior perspective is not evidence of authority approval. Establish the applicable checks with the appointed professionals, then incorporate their requirements into the design sequence. For existing houses, BCA’s approved-plan purchase service may also help eligible applicants obtain available building records, subject to the service’s conditions.
Start the Landed Interior Design Process With a Brief
Describe Daily Life Before Selecting a Style
List the people using the home, their routines and the activities that compete for space. A multigenerational household may need quiet sleeping areas away from evening entertainment. Frequent cooking may make cleaning access and storage more important than a completely open kitchen.
Record what already works in the house and what causes friction. Include furniture to retain, collections to accommodate, work arrangements and likely future needs. Photographs can communicate preferences, but annotate what you like about each image. Otherwise, the designer must guess whether your priority is the colour, layout or atmosphere.
Establish Priorities and a Spending Boundary
Separate essential outcomes from optional features. Discuss the overall spending boundary and identify what it includes: construction, consultant appointments, furniture, appliances or temporary accommodation. These categories do not automatically sit within one interior design quotation.
Consider when to engage an interior designer early, so the appointment can inform the brief before major commitments are made. The brief should also identify the decision makers and approval method. Conflicting instructions from different family members can undo completed design work. Agree who consolidates feedback and how unresolved choices will be escalated, especially when a decision affects ordering or fabrication.
Review the Existing House and Scope
A measured survey helps establish dimensions, levels and visible conditions. Available drawings provide context, but the team should identify what still requires verification. Concealed services, existing structural details and water ingress may need further investigation by suitable specialists.
The useful output is an existing-conditions record and an agreed scope boundary. Clarify whether the project is an interior fit-out, involves additions and alterations, or needs a wider building exercise. Record assumptions and exclusions so that the concept is not developed around conditions nobody has confirmed.
Test Layout Options Against Real Use
Space planning should examine circulation, furniture clearances, storage and relationships between floors. In a deep terrace house, for example, the position of enclosed rooms can affect how the centre of the plan feels. An attractive arrangement on one level may create awkward service routes elsewhere.
Compare a small number of meaningful options against the brief. Ask what each option improves, what it compromises and which assumptions need professional confirmation. Before approving the preferred layout, review it with actual furniture and appliance dimensions rather than generic symbols alone.
Develop the Concept Into a Coordinated Proposal
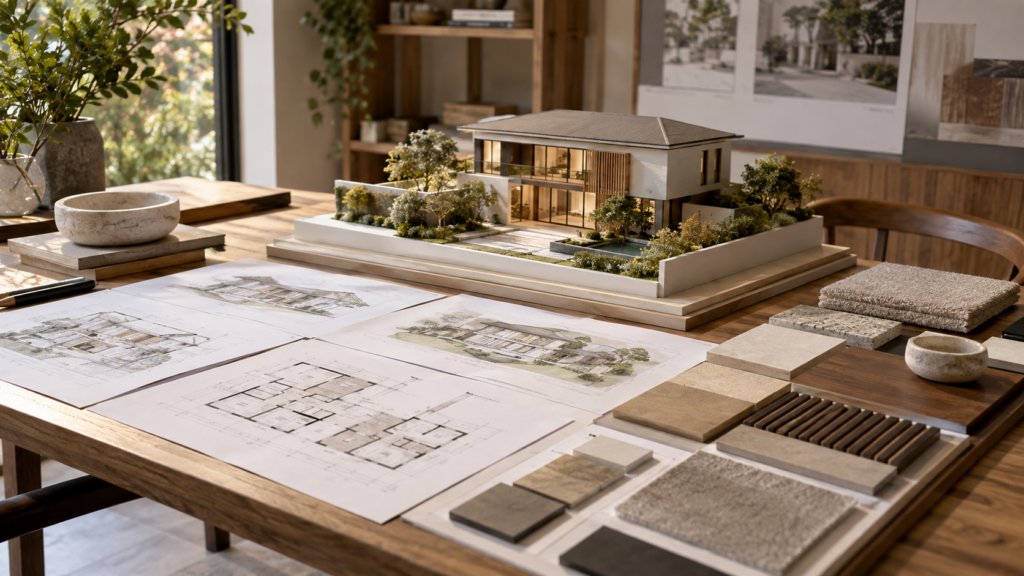
The concept stage establishes material direction, lighting character, major built-ins and the relationship between spaces. Perspectives can help the household understand the proposal, but they should be checked against plans and the likely scope of work.
Discuss how the design responds to maintenance, natural light and everyday wear. A dramatic surface may need more care than the household wants to provide. The useful approval is a coherent direction with known priorities, not an assumption that every object shown in a rendered image will be supplied.
Resolve Drawings, Samples and Specifications
Detailed design translates the concept into information that trades can use. Depending on the appointment, this may include setting-out plans, elevations, lighting layouts, carpentry details and material schedules. Confirm the actual deliverables in the proposal instead of assuming that all firms provide the same drawing package. Our guide to reading interior design drawings explains how plans, elevations and renders communicate different information.
Coordinate interfaces before fabrication. Cabinet dimensions must work with selected appliances; ceiling details must allow for the intended equipment and access; switches should relate to furniture positions. Record the approved revision and keep superseded drawings out of the active construction set.
Review physical samples under relevant lighting where practical. Agree finish codes, edge details, hardware and visible junctions. A sample approval register helps the team distinguish a confirmed selection from an early option that remained on the presentation board.
Align the Design With Procurement and Construction
Once scope and specifications are sufficiently defined, reconcile them with the quotation and procurement plan. Identify allowances, excluded items and selections that could affect cost or lead time. The design team should explain what must be decided now and what can remain open without disrupting the next stage.
Use a decision schedule alongside the landed renovation timeline. This keeps the process focused on dependencies rather than promising a universal number of weeks. A worktop order, for example, may depend on confirmed cabinetry and site measurements, while selected equipment information may be needed much earlier.
Manage Site Questions and Changes
Construction will generate questions even with a thorough design package. Establish who receives requests for information, who gives instructions and how responses are recorded. Separate design clarification from a change that affects the agreed price or programme.
If you appoint a team for landed renovation project management, confirm its inspection, reporting and coordination duties. Attendance at occasional meetings is different from continuous site supervision. Make the agreed level of involvement explicit so that the owner understands which checks remain with the contractor or other appointed professionals.
Maintain a concise decision log with the issue, action owner and required response date. When a revision is approved, distribute the updated information to everyone affected. This is particularly important where one change alters cabinetry, electrical points and surface finishes together.
Inspect, Record and Hand Over
Before move-in, inspect the completed work against the agreed scope and compile a clear outstanding-items list. Record locations and photographs so that each item can be understood without repeated explanation. Test relevant fittings and ask how to operate and maintain installed products.
Confirm how unfinished work, defects and warranty requests will be handled, including access arrangements after occupation. Keep product documents, approved drawings and contact information together for future maintenance.
Prepare for a Productive First Consultation
Bring your available plans, household brief, preferred move-in period and an initial spending boundary. Include a short list of frustrations with the existing home and a few annotated reference images. These inputs give the designer more useful direction than a large folder of unrelated inspiration.
For a discussion about landed interior design for your household, ask Yang’s to explain the proposed deliverables, professional interfaces and owner decisions for your particular scope. A clear process makes it easier to assess the appointment and approve the next stage with confidence.
Frequently Asked Questions
How Does the Design Process Differ From the Renovation Timeline?
The design process describes the decisions and deliverables needed to develop and implement the home. The renovation timeline places activities into a sequence with dependencies and dates. They work together: delayed layout approval or appliance selection can affect procurement and site progress even before visible installation begins.
Should I Approve a Design Based Only on Renders?
Renders help communicate appearance, but they do not replace coordinated drawings, specifications or scope confirmation. Check dimensions, selected products, maintenance needs and included items before approval. Ask the designer to identify any illustrative accessories or unresolved technical details so your expectations match the actual proposed work.
When Should I Choose Appliances and Major Fixtures?
Choose them early enough for their dimensions and installation requirements to inform the relevant drawings. The precise deadline depends on the procurement and construction sequence. Ask the team for a decision schedule covering cabinetry, service connections, ventilation and delivery, then confirm product information before affected work proceeds.
What Should I Keep After the Project Is Completed?
Keep the signed scope, approved revisions, variation records, receipts and available product documents in one organised folder. Include the handover list, maintenance instructions and warranty contacts. These records help with later servicing and make it easier to explain the installed work to another professional if needed.

September 28, 2026
Yang's Inspiration Insight